Creation of an application repository
Overview
There are two main methods to import existing repository to newly created project.
Import an existing repository via Azure DevOps GUI
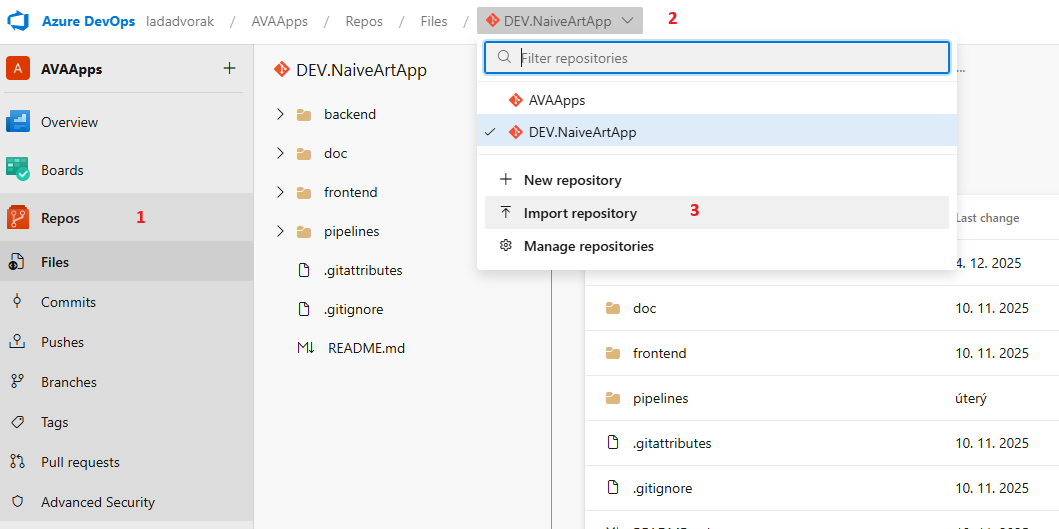
You can import your code from another Git-based repository (i.e., from Gitlab) into your Azure DevOps project. Select the Repos section (point 1), click the repository list in the top (point 2), and select Import repository (point 3).
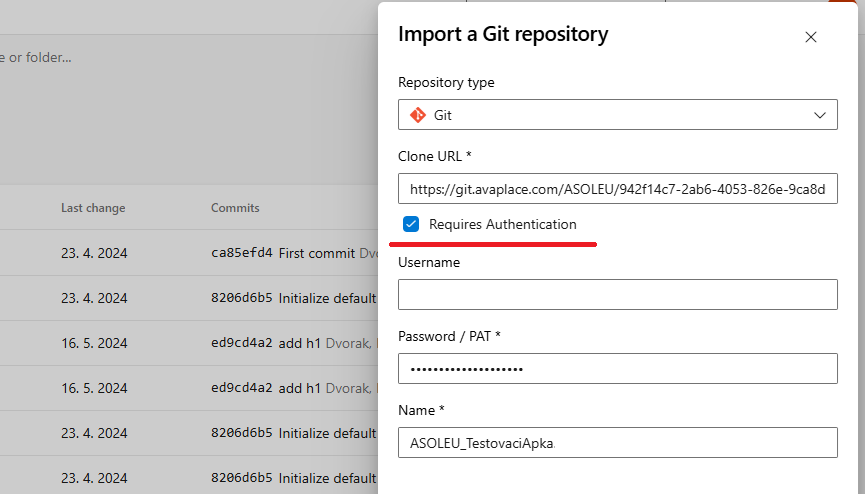
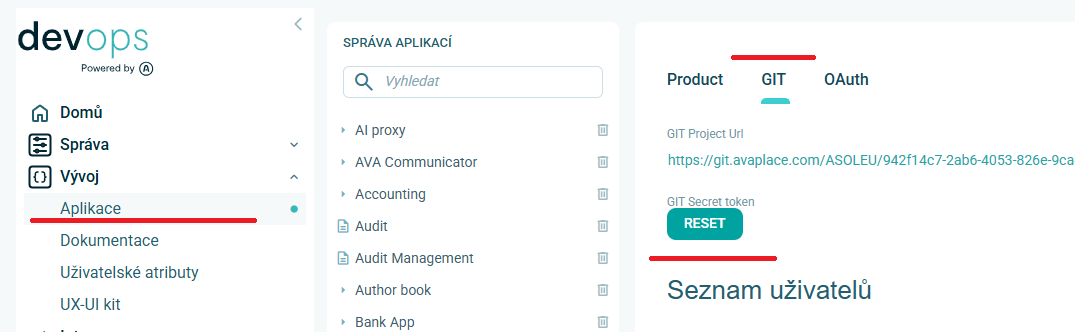
This dialog appears, into Clone URL copy url shown in the Asseco's DevOps application (shown in two pictures below) and make sure to select the Required Authentication field. Fill in the Password / PAT field with the GIT Secret token you received also from the Asseco's DevOps application.
If no longer remember GIT Secret token, you can reset it, in DevOps application.
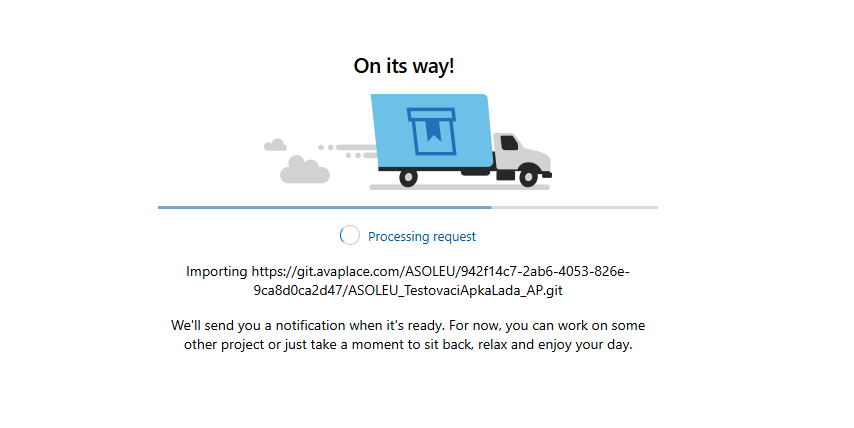
After you click on the Save button, import starts.
After the import is over, imported repository appears.
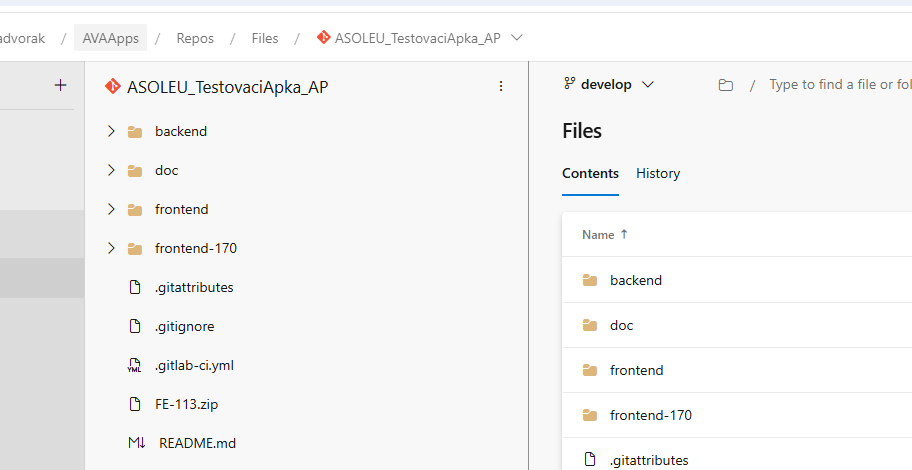
The recommended approach is also described in the official documentation: Import a Git repository to a project
Import an existing repository from outside Azure DevOps via command line
If you are user who prefers git command line, follow these instructions.
Option A - complete mirroring (--mirror)
Use this when you want a 1:1 copy of the repository, including all refs (even those not visible in the UI).
- Moves all references, including branches, tags, remote refs, notes and configuration.
- On target server will be old as well as deleted branches, that are not shown in UI.
- This is the best method for archivation, if you really need complete imprint of repository.
Option B - only common branches and tags (--bare)
Use this parameter, when you want clean and simply repository, contains only current brancheas and tags as seen in the UI.
- All common branches and tags (
refs/heads/*) will be transfered. - Do not move deleted and old tags.
- Is the most suitable variant for migration of applications with ongoing development.
Step by step procedure
-
Prepare empty repository On target server create new empty Git repository (described in step 3). But in this case, do not insert any files (as
README.mdor.gitignore) -
Clone source repository Option A - complete copy (mirror)
git clone --mirror https://<url to git>.gitOption B - only common branches and tags (bare)git clone --bare https://<url to git>.git -
Switch remote URL
cd <name-of-repository>.gitgit remote set-url origin https://<curl to git> -
Push content Option A - mirror
git push --mirrorOption B - baregit push --allgit push --tags
Create empty repository within your project
Last option is to create an empty repository and get application code there on your own.
More detailed is this described in the official documentation:
Create a repo using the web portal
Here it is recommended to set .gitignore file to Visual Studio specific settings.
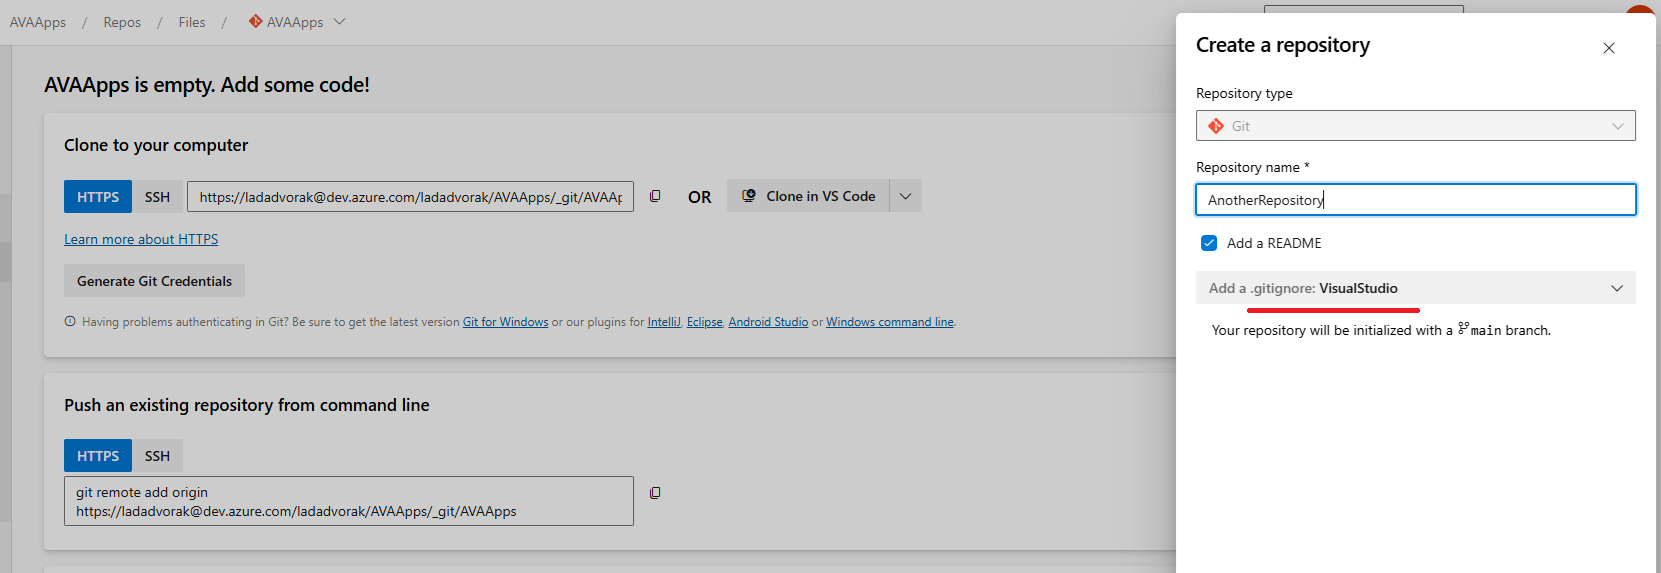
After completion of importing process, you can obtain here the repository's URL and subsequently use it in your IDE to begin development.
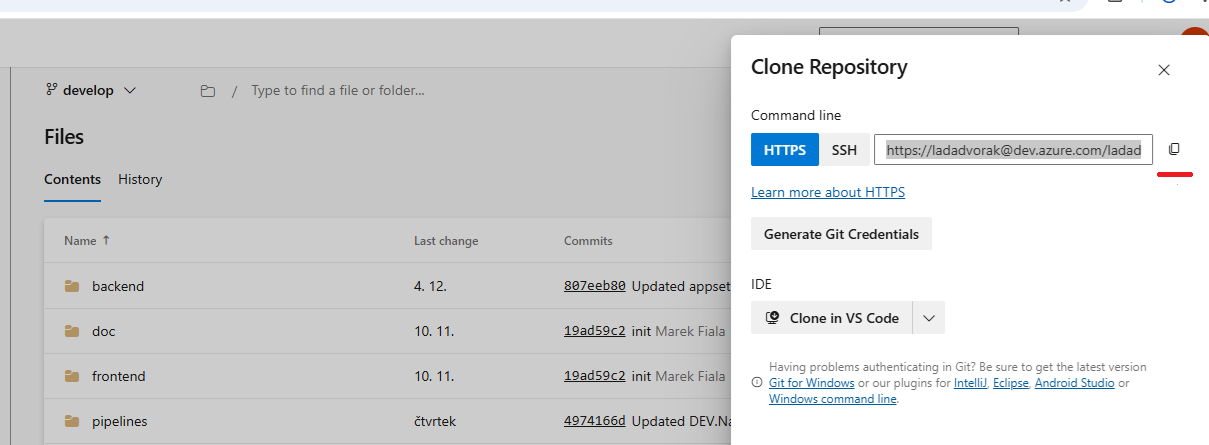
This is again in more detail described in Azure DevOps documentation: Browse to and then clone an Azure DevOps repo
Ultimately, all repository names should follow this convention: (partner name)_(the repository name itself) . E.g., Partner_TheBestApplication .
Continue with the step Prepare pipelines inside repository.